
A Spice Hall cannot help a crew member who leaves as soon as you arrive. In Star Traders: Frontiers, the desertion check happens when you land, before you can use the zone’s services. A nearby port with excellent entertainment is therefore a recovery destination, not automatic protection for the trip down.
If morale has collapsed after a battle, salvage operation or rough voyage, pause before landing. Inspect the affected crew, check your ready desertion-prevention talents and compare the nearby destinations. Then deal with the cause of the morale loss, or the next journey can end the same way.
The order that catches captains out
- Before landing: inspect individual morale, available talents and the destination.
- On landing: unhappy crew may attempt to desert; eligible, ready prevention talents can stop some of them.
- After landing: you can pay and use the Spice Hall to improve the morale of crew still aboard.
This is why “I was about to buy them spice” does not prevent the loss. Wages and entertainment help after you reach the services. Neither retroactively protects the landing that already happened.
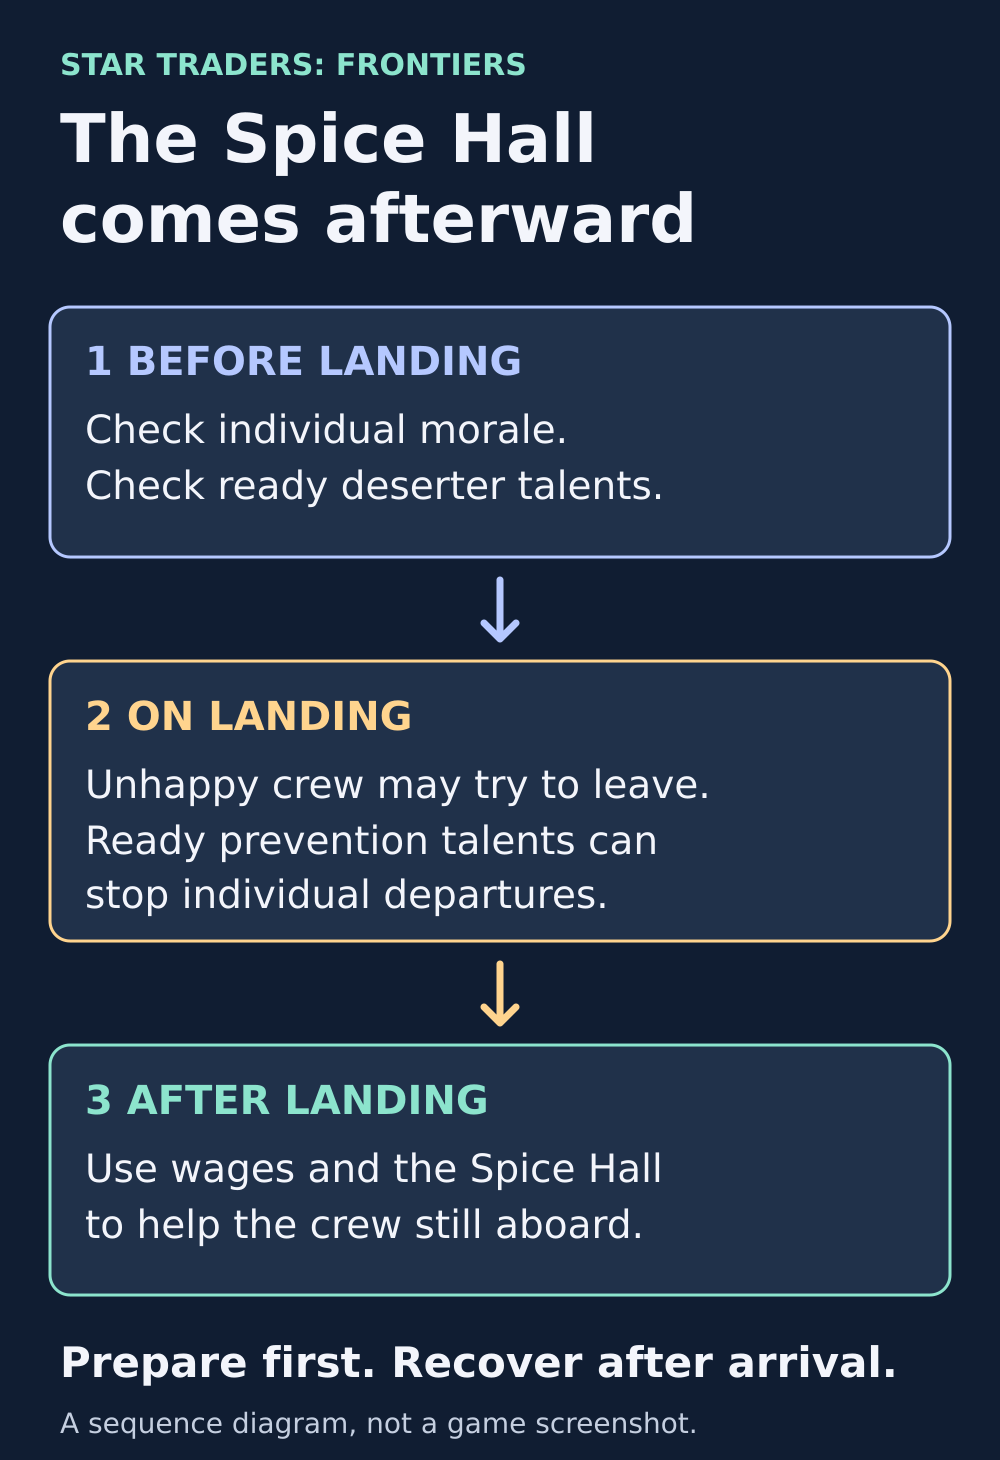
Prepare before touching down. The Spice Hall comes after the desertion check.
1. Look at the least happy crew, not just the average
Open your crew list and sort by morale. Identify the people at the bottom, their jobs and the skills you would lose if they left. A comfortable ship-wide average can hide a handful of crew in serious trouble.
The community wiki lists a desertion threshold below 36 morale for non-officer crew landing in an urban zone. That is a risk threshold, not a prediction that everyone below it will leave. Difficulty, the destination and the crew member’s circumstances also matter. Do not aim to travel indefinitely one point above the line: another damaging event can erase that margin.
Officers normally do not desert, but the Wayfarer trait is an explicit exception when morale is low. Check that trait if an officer is the person you are worried about.
Check your recent event log while you are here. Did morale drop during failed travel skill checks, a ship battle or the activity you just repeated? Knowing which event hurt the crew tells you what to stop doing immediately.
2. Check the right talents before committing to the landing
A talent that ends a mutiny is not the same as one that prevents a deserter from leaving. Look for a description that explicitly triggers when landing and persuades a departing crew member to stay.
Examples listed in the community wiki include:
- Contract Bargain, Quartermaster rank 1.
- Unbending Law, Zealot rank 1.
- Relentless Stare, Gundeck Boss rank 5.
The wiki describes all three as targeting the highest-level crew member attempting to abandon the ship, adding 2 credits to that person’s salary and having a three-week cooldown. They are limited saves, not a blanket promise to keep the entire crew. Check that the talent is learned and available rather than merely present in the job’s talent list.
If nobody has a suitable talent trained, inspect an eligible character’s Talents while still in orbit. Use an available talent point, or check Retrain and its displayed cost. Retraining changes talent choices, not jobs or job ranks; review everything you would be replacing and confirm the needed talent is available before landing.
More than one prevention talent can trigger on a landing. Trese Brothers changed the rules to permit up to five ready talents, so an old answer saying that only one can work is out of date. That still requires the relevant talents to be ready; “I have a Quartermaster” is not enough.
For example, if several crew are in danger and only one applicable save is ready, plan as though the others remain exposed. Do not treat a single Contract Bargain as permission to ignore every red morale warning.
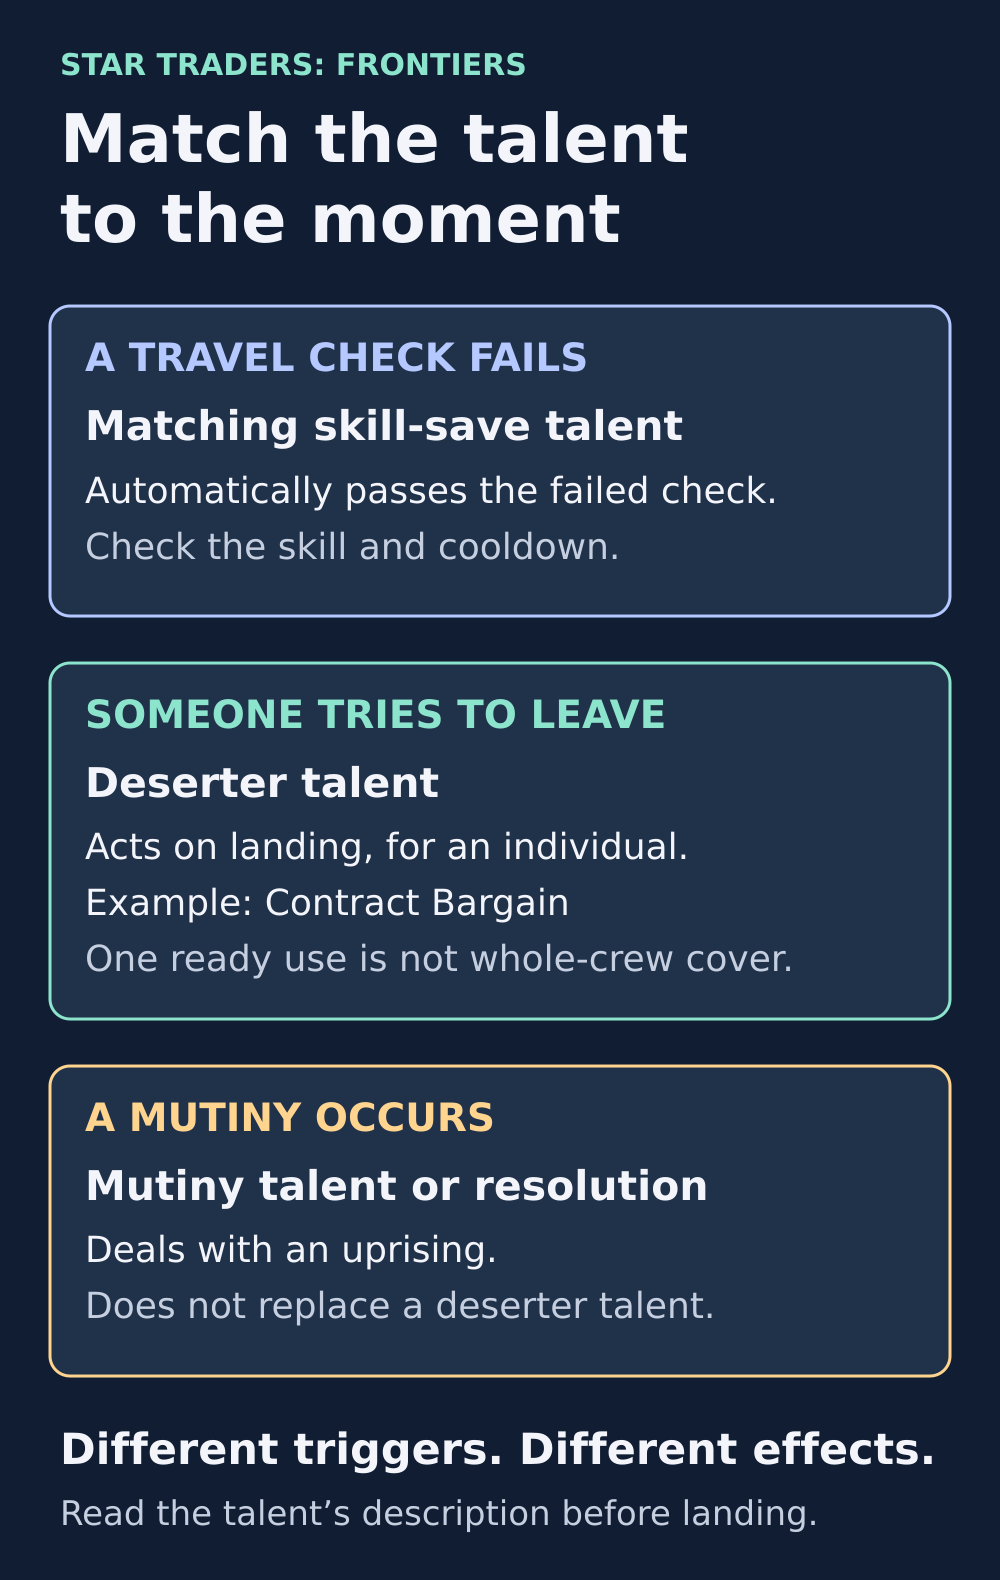
Read the trigger, not just the talent’s reassuring name. Preventing a failed check, stopping a deserter and ending a mutiny solve different problems.
3. Compare destinations without trusting a “safe world” shortcut
Your relationship with a faction and a crew member’s desire to settle there are different things. A world that welcomes your captain is not necessarily the least tempting place for an unhappy crew member to leave.
The developer’s desertion rules make crew more likely to leave on a world of their own faction and less likely across faction-type boundaries. Independent zones can reduce the risk in some cases, but they are not immune to desertion. That exception was explicitly removed in an update. Longer-serving crew also gain resistance, not a guarantee.
Compare a nearby destination’s services, faction and journey length. Do not chase a distant “perfect” port while repeatedly failing travel checks. Equally, landing somewhere without usable morale recovery may leave you needing another risky landing immediately afterward.
If no option removes the risk, choose with that uncertainty in mind. Repeatedly landing and taking off does not make the vulnerable crew safer.
4. Once you are safely down, restore morale deliberately
Check whether wages are due and what the local Spice Hall can actually do. You cannot pay a crew member repeatedly on demand: the community zone reference lists a normal payment interval of 30 days per person.
The community zone reference gives a hall’s baseline morale ceiling as 15 times its Spice rating, with a normal maximum of 80. Rychart halls can reach 90. A rating-4 hall therefore tops out at 60, even when the interface has no more entertainment to offer. “Nobody needs spice here” does not necessarily mean your crew is ready for a punishing voyage. Traits can also limit or change individual results.
The service order depends on your goal:
- To spend less on recovery, paying first can reduce the amount of spicing still needed.
- To build a larger morale buffer when payment is due, spice first and pay afterward. Wages can take morale above the hall’s ceiling.
Both choices happen after the landing check. Reopen the crew list afterward and confirm who actually improved before setting off.
5. Fix the damage source before the next voyage
Morale recovery is expensive if you immediately repeat the activity that wrecked it. Use the log to choose the next adjustment rather than buying unrelated talents at random.
- Repeated failed travel checks: strengthen the relevant crew skill pools and train matching skill-save talents. Watch whether those saves are already on cooldown when the next failure occurs.
- A battle that battered the crew: recover before seeking another fight. Use suitable morale-restoring combat talents during battles you can manage, but do not assume starting a fight is a harmless repair service.
- Repeated damaging salvage or other operation results: stop pressing for one more reward with an unprepared crew. Review the risks and your available protective talents before trying again.
- A few people repeatedly losing morale: inspect their revealed traits as well as their jobs. A crew member’s reactions may not suit the activities you keep choosing.
Do not dismiss a specialist reflexively just because they are unhappy. Losing the person who supplies an important skill or saving talent can leave the next journey less protected. Recover first where practical, then make staffing changes deliberately.
What about ship-combat morale tricks and Large Pay Raise?
Some ship-combat talents restore morale, but their trigger matters. A combat-only talent is not a button you can freely use while travelling. Starting a fight to access one can expose a damaged ship and unhappy crew to further losses. It is an option for captains who understand the encounter, not the default emergency recommendation.
Large Pay Raise is also not a free-standing command for unhappy crew in orbit. It is an offered resolution during a mutiny. The developer added it with a larger morale benefit than the normal raise, but that does not make deliberately provoking a mutiny a safe recovery plan.
A short checklist before you land
- Have I checked the lowest individual morale values?
- Which important skills or talents would a departure remove?
- Are my landing-specific prevention talents actually ready?
- Does this destination offer recovery I can use?
- Am I relying on an outdated claim that Independent worlds are always safe?
- After landing, will I verify the crew’s morale before repeating the activity that caused the problem?
The dependable habit is to prepare before landing and recover before the next crisis. A Spice Hall is valuable, but it cannot protect a crew member who has already walked away.
Sources and further reading
References checked on 5 November 2026. The developer updates below explain the desertion changes and exceptions. The community wiki provides the talent and service references. This guide covers Star Traders: Frontiers, not the earlier Star Traders RPG. Check the talent descriptions and service information in your installed version before committing a talent point or relying on a numerical limit.
Morale and individual crew risk
The community wiki describes morale thresholds and ordinary crew desertion.
Read the morale referenceThe Wayfarer officer exception
Update #182 explains the trait that can allow an unhappy officer to leave.
Read the developer updateLanding-specific prevention talents
Compare the trigger, job rank and cooldown in the community talent reference.
Read the talent referenceChanging talent choices in orbit
The community FAQ explains where talent retraining is available and how it differs from changing jobs.
Read the retraining FAQMore than one ready save can trigger
Update #151 explains the increase from one to as many as five ready desertion-prevention activations.
Read the developer updateDestination and desertion rules
The January 2018 rules update explains why Independent worlds are not automatically safe.
Read the developer updateSpice rating, wages and morale limits
The community zone reference explains hall ceilings and why service order depends on your goal.
Read the service referenceFinding the cause of morale damage
The crew-management reference covers travel failures, combat, activities and individual traits.
Read the crew referenceLarge Pay Raise is a mutiny response
The November 2023 update describes the expanded mutiny-resolution options.
Read the developer update
Latest comments
Log in to join the conversation
Log InNo comments yet. Be the first to share your thoughts!