
To leave the new Imp quest, use the Escape Crystal in your inventory. The Vault Beacons found near the entrance only take you back to the vault’s starting room. They are useful retreat tools, but they do not finish the quest.
Before confirming an exit, read the Imp’s offer. How much of the vault you have explored and cleared affects what you can bring home and whether he opens his later shop. You can leave alive without beating the boss, but a very early retreat earns much less.
This guide covers the new vault quest in Shattered Pixel Dungeon v4.0.2. It includes puzzle solutions and boss-form spoilers. Use it when the Imp sends you into the vault, rather than for the older task of collecting tokens in the main dungeon.
Know your two ways to retreat
A Vault Beacon returns you to the entrance while keeping the current vault attempt open. Two are placed in the starting room, and each successful use consumes one. Pick them up before wandering far, and keep one accessible when investigating a dangerous room. Returning to the entrance gives you another route to explore or space to reconsider a bad fight. The beacon needs a reachable path back: once the boss arena seals, it may not be able to return you to the entrance. The Escape Crystal can still end the quest there.
The Escape Crystal ends the attempt. Your stored equipment is returned, but you cannot re-enter the same vault to collect something you left behind. Treat the final exit confirmation as your last decision about the quest.
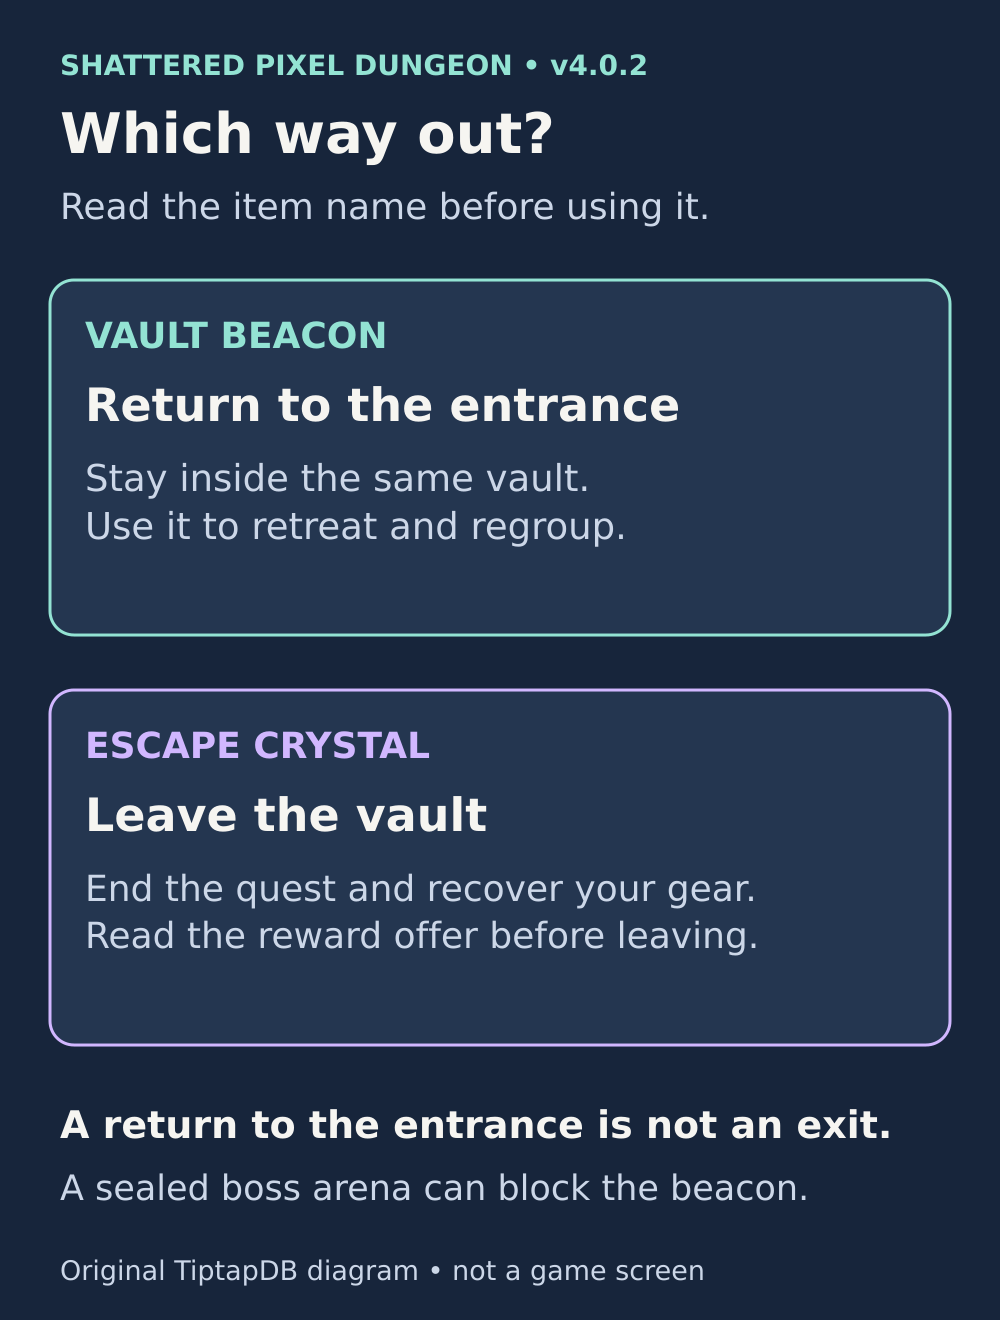
Read the item’s name instead of relying on its appearance: returning to the entrance and leaving the vault are different actions.
To check your exit offer, open the Escape Crystal and choose USE. Read the Imp’s message, then choose Stay Here if you want to continue exploring. With enough progress to earn an item, leaving opens an item selector followed by a confirmation. At the earliest exit tier, Leave the Vault can end the quest immediately without an item. Do not press it just to see what happens.
At the very beginning, the crystal can ask you to leave the first room before offering an exit. Once you are exploring, check the offer while you still have time to make a decision, rather than waiting until the next hit will kill you.
The vault can end your run
The Imp stores your normal equipment outside the vault. You start with cloth armour and an Escape Crystal, rather than your usual damage, defence and recovery items. A strong build in the main dungeon does not make the opening rooms a routine fight.
Death here is real. The quest does not simply eject you for another attempt, and an Ankh stored with your old belongings is not sitting in your current backpack protecting you. Use a beacon to disengage or the Escape Crystal to abandon the attempt before the situation becomes fatal.
A successful exit heals you and resets your hunger while returning your stored gear. That makes leaving a failing attempt a practical way to preserve the run. It does not make reckless fights inside the vault harmless.
Start with accessible loot, then choose your fights
Your first objective is to assemble usable equipment from the easier rooms. Look for loot you can reach without fighting a strong guard or spending a consumable you do not yet have. Equip a suitable weapon and armour before treating the patrols as a source of tokens.
The vault gives you more information about moving enemies than an ordinary floor. Brief visual traces can reveal a patrol beyond your direct line of sight, including through walls. Watch from a safe tile, let the enemy pass, and use another doorway or follow at a distance. A patrol’s reduced awareness behind it helps with sneaking, but walking directly into it is still dangerous.
If an enemy starts investigating, break its view with a corner or door instead of turning every encounter into a fight. If more threats gather than you can manage, retreat while you still have the resources to do so. Some rooms can be revisited after another room supplies a weapon, potion or wand.
If you watched an early beta video, some details have changed. The October v4.0.1 patch made heard enemies clearer, added a healing potion near the entrance and eased several hazard rooms. The advice here follows v4.0.2, not the original tester area.
Match the hazard, not just the colour of the room
Use Inspect on the actual hazard before stepping into its range. A room that alternates dangerous and safe tiles asks for timing; a room that covers the route continuously asks for another solution. Do not spend a rare consumable just because the first doorway looks intimidating.
Fire fields: Purity, not Levitation
For the continuously firing vault flame traps, drink a Potion of Purity before crossing. It protects against their area effect. A Potion of Levitation does not grant that immunity: these vents fire on a timer, rather than waiting for your weight to trigger them.
Intermittent flame rooms can instead be crossed by observing the pattern and moving between safe positions. In the alternating-fire room, the current version has a safe outer border. Identify your next safe tile before advancing and keep enough protection for the return journey if you use a potion.
Scanning sentries: avoid being seen
A scanning sentry watches a pattern. When the layout leaves a safe opening, observe the scan and move through after it passes. When the treasure stays under observation, invisibility can solve the visibility problem. Check the entire route, including how you will leave after picking up the item.
Disintegration beams: avoid the beam itself
Disintegration sentries fire along fixed lines, at regular or semi-random intervals. Being invisible does not turn a beam off. Time a crossing where the room provides a safe gap; use a suitable teleport option when a route cannot be crossed safely on foot.
Plan both directions before spending a Stone of Blink. Reaching a prize is only half the problem. If the only plan for coming back is to absorb several beams, leave the room for later.
The vault does not generate an alchemy station, and your normal Toolkit and stored energy do not enter with you. Plan the early rooms around found supplies rather than recipes you expect to craft at a pot. An alchemy solution that works in the main dungeon may be unavailable when you need it here.
Ten tokens open the mirror room
Collect dwarf tokens from vault enemies and treasure rooms. The strange door with ten indentations needs 10 tokens. It leads to the mirror room; it is not a token toll for the final boss door.
This gives you a reason to return for manageable enemies and earlier loot after finding better equipment. You do not need to choose the most dangerous fight merely because it is closer.
The Strange Mirror supplies a class-specific item that restores an important part of your hero’s toolkit inside the vault. It is tied to the mirror, rather than being a permanent sacrifice of the original equipment stored outside. Read its description before planning to take it home as your reward.
The Greater Elemental rewards a mixed inventory
Before committing to the boss, keep a usable melee weapon, a ranged weapon and a source of damaging magic if you have found them. Inspect the Greater Elemental again whenever its form changes. Its preferred counter changes with it:
- Fire form: favour ranged or thrown weapons, rather than wands. Magic is resisted. Watch the aimed fireballs and look for the gap in the waves of flame.
- Frost form: favour melee weapons. Thrown weapons are resisted. Its cold cone is especially dangerous at range, so watch its attack pattern while closing in.
- Shock form: favour magic. Melee is resisted. Dodge the lightning and the lines of sparks rather than continuing to attack from a threatened tile.
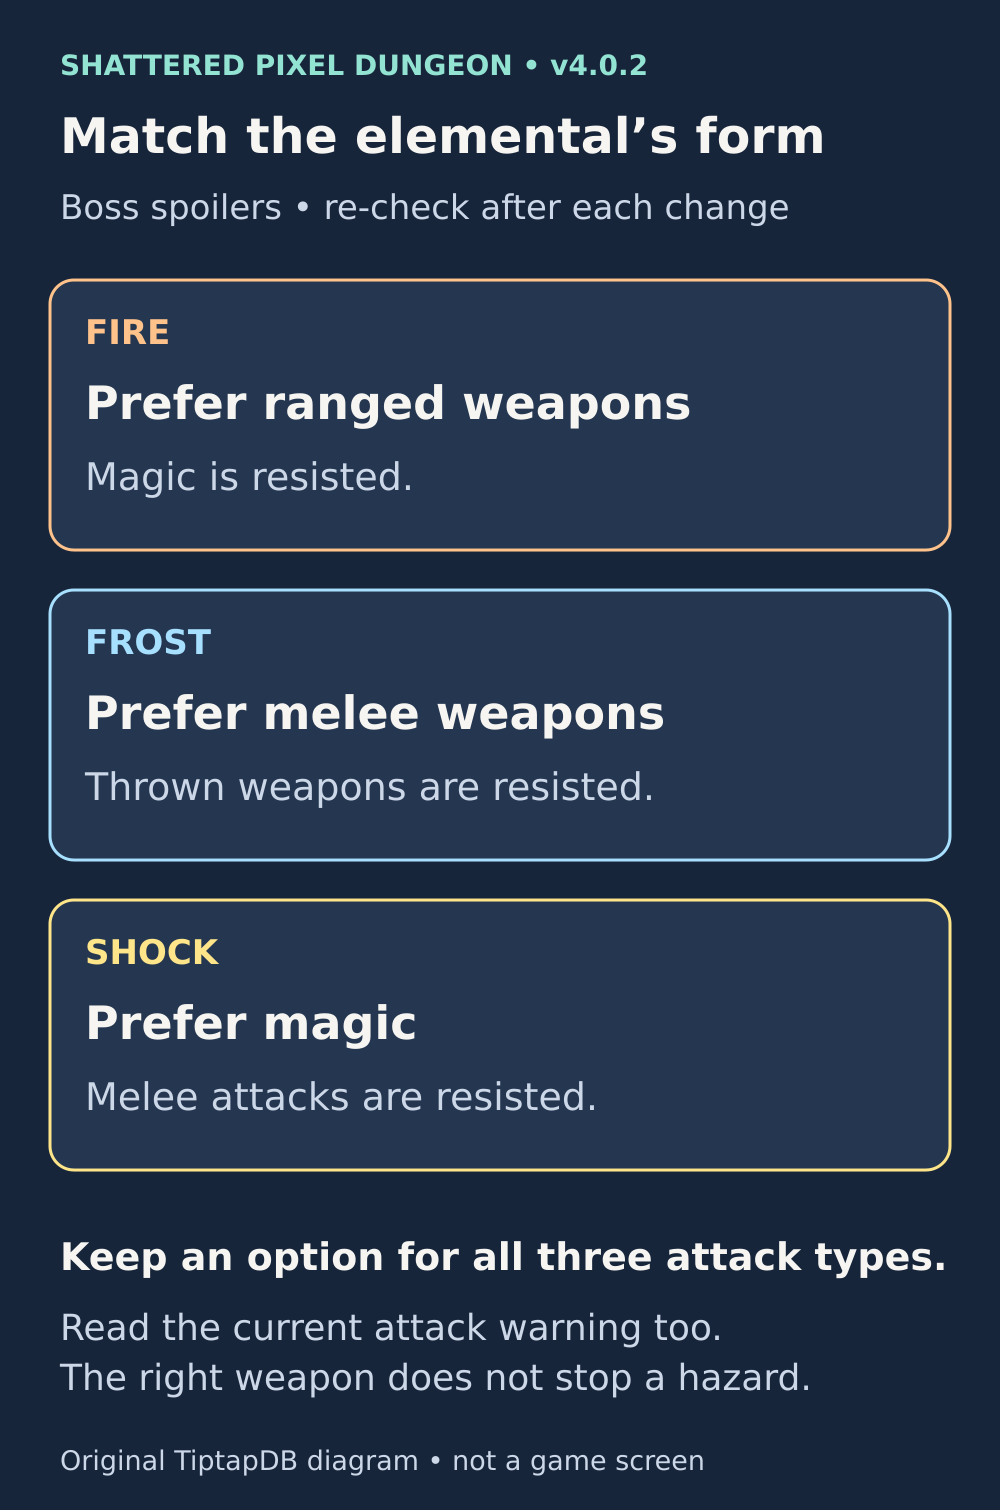
Match the current form, not a memorised order. A good damage choice still needs a safe position.
A powerful weapon that worked in the previous form may become an inefficient choice after the switch. Keep healing and escape options available, and avoid spending your last useful resource simply to force an attack into resistance.
Decide what to take home before confirming the exit
The Imp’s message from the Escape Crystal tells you which reward offer you have reached. In v4.0.2, the offers progress through these stages:
- Very early retreat: no item reward.
- Some exploration: one eligible consumable, such as a potion or scroll.
- More exploration: one eligible item without positive upgrades.
- Strong partial completion: one eligible item at +1 or lower, and the later shop opens.
- Return with the Obsidian Statuette: one eligible non-unique item without that upgrade cap, plus the later shop.
The +1 partial-completion offer is enough to unlock the shop without defeating the Greater Elemental. If that is the main thing your run needs and the boss looks too risky, leaving can be a sensible result. The partial cap is +1 in this version; higher-upgrade loot needs the full-completion offer.
For full completion, collect the Obsidian Statuette from the final area after defeating the boss, then use the Escape Crystal. Beating the boss without picking up the statuette is not the same as returning with the quest objective.
Choose a reward for the build waiting outside, not just the temporary gear that carried you through the vault. Compare it with your stored weapon, armour, rings and wands, and consider whether it fills a weakness you still have for the rest of the dungeon.
Consumable rewards are one unit, not the whole stack. Quest items and most mirror-bound class items cannot be selected as your reward. In particular, taking armour with the mirror’s Broken Seal removes that seal and lowers the armour’s level by one while preserving its glyph. An imbued mirror Mage’s Staff can be selected for its wand: you receive the wand rather than the staff, at one level below the staff. Read the selection warning and judge the item you will actually receive.
Once you confirm the final departure, the remaining loot stays behind. If you are unsure, choose Stay Here, review the candidates and leave when the choice is clear. A useful reward and a surviving hero are better than losing the run for one more room.
Sources and further reading
Vault Beacon
Review the teleport item that returns you to the entrance while keeping the quest open.
Read the sourceExit choices and reward limits
Check the Escape Crystal’s confirmation flow, reward eligibility and exit restoration.
Read the sourceVault entry and stored equipment
See how the Imp’s quest stores equipment and prepares the vault attempt.
Read the sourceDeath and carried Ankhs
Check the hero’s death routine and why an Ankh stored outside the current inventory does not protect the vault attempt.
Read the sourceVault patrol behaviour
Review the patrol, detection and investigation behaviour used by vault enemies.
Read the sourceVault clarity and balance changes
Read the developer’s October changes to heard enemies, entrance supplies and hazard rooms.
Read the sourcePurity’s area-effect protection
See the area effects covered by the immunity granted when a Potion of Purity is drunk.
Read the sourceVault flame traps
Check the timed flame effect and the protections that apply to it.
Read the sourceScanning sentries
See how a scanning sentry detects visible targets in its scan area.
Read the sourceDisintegration sentries
Review the beam behaviour and why avoiding its path matters.
Read the sourceGreater Elemental
Check the boss’s changing forms, resistances, vulnerabilities and attacks.
Read the sourceUnlocking the later shop
Check the completion condition that permits the Imp to open the later shop.
Read the source
Latest comments
Log in to join the conversation
Log InNo comments yet. Be the first to share your thoughts!